Официальный Российский форум Раду

Информация о пользователе

Привет, Гость! Войдите или зарегистрируйтесь.


Вы здесь » Официальный Российский форум Раду » Chit-chat » How To Make Animated Avatars


How To Make Animated Avatars

Сообщений 1 страница 2 из 2

1

I promised it for a long time and now i managed to do it)))
 
A lot of people often asked me how to make animated avatars
Now i will explain

1. You need to make shots out of the video (progs like Light Alloy, Power DVD, Win DVD) approx. every second or third frame of the piece you need (making every frame would unnecessarily icrease the size of the avatar and have little impact on how it looks like).

2. Open all the files in Photoshop (you can work in Image Ready at once - but I feel more comfortable here first).

[реклама вместо картинки]

3. By using copy-paste, collect all the images into one multi-layer file. Look for the layer called "background". Copy this layer. Delete it and only leave "background copy".

[реклама вместо картинки]

4. Use this button to select the area you need for your avatar. Hold Shift to make a perfect square. Press Enter.

[реклама вместо картинки]

5. Go to Image>> Image Size and make it 100x100 (or other you need) pixels.

[реклама вместо картинки]

6. Here you can find frames for avatars. Save any and open in Photoshop.

[реклама вместо картинки]

By the way, you can change the color of the background squares you see - it helps a lot when the color of the image is similar to that of the squares. On the picture you can see how to do it.

0

2

7. Zoom the image for comfort. Copy the frame and paste it as top layer.

[реклама вместо картинки]

8. Select the area you need to erase. How to do it? Select one rectangular part, press Shift, select another etc. until everything is selected.

[реклама вместо картинки]

9. Now work with the layers menu. Select each layer one by one (except the frame layer) and press Delete. See what happens in the end.

[реклама вместо картинки]

10. Deselect. Save the whole work as avatar.psd and now open it in Image Ready.

11. If you understand the principles of work in Image Ready everything will seem easy to you. You will need two menus - Layers and Animation. Click on the arrow (see picture) and choose "Make frames out of layers". Reverse the frames (same: clicking the arrow) if they go from the end.
Now try what else you can do with the animation menu: delete, duplicate frames etc. Note that the first frame is just a "help" frame which should be in the end deleted. Whan you make a layer visible in this frame it will become visible in all other frames.

[реклама вместо картинки]

12. Watch the animation. Make a suitable interval for the frames.

[реклама вместо картинки]

13. With regard to smileys... adding animations etc... It's difficult to explain - you need a bit of creativity to insert it. Suppose you want to insert this smiley. http://diary.ru/picture/1144.gif
Save it, and open in Image Ready. One by one copy all the layers and paste them in your avatar (you won't need to copy all if you understand that some of them are the same). Now you need to move all the smiley layers to the corner, then choose which layers would be visible in which frames (the creative part), watch for the buttons on the top of Layers menu (unify layer visibility/position/style) - they will be very useful.

[реклама вместо картинки]

14. Save the final animation. Then use File>>> Save optimised as, to save it as avatar.gif and upload the final avatar.

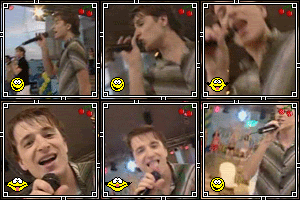
http://i54.photobucket.com/albums/g114/Kalinka123i/Bin/PDVD_028.gif

Any questions - YIM kalinka123i

Good luck!  ;)

0


Вы здесь » Официальный Российский форум Раду » Chit-chat » How To Make Animated Avatars